¶ Prerequisites
- Base HSHQ installation (see Installation)
- A personal VPN (see Set Up Personal VPN)
Exposing a website to the public internet carries additional risks. It allows anyone to access your site from anywhere in the world. If the site contains vulnerabilities, they could be exploited and your entire HomeServer could be comprimised. Be very careful with this capability - only expose what you need to, and access everything else via your personal VPN.
¶ Instructions
¶ Step 1 - Install Service
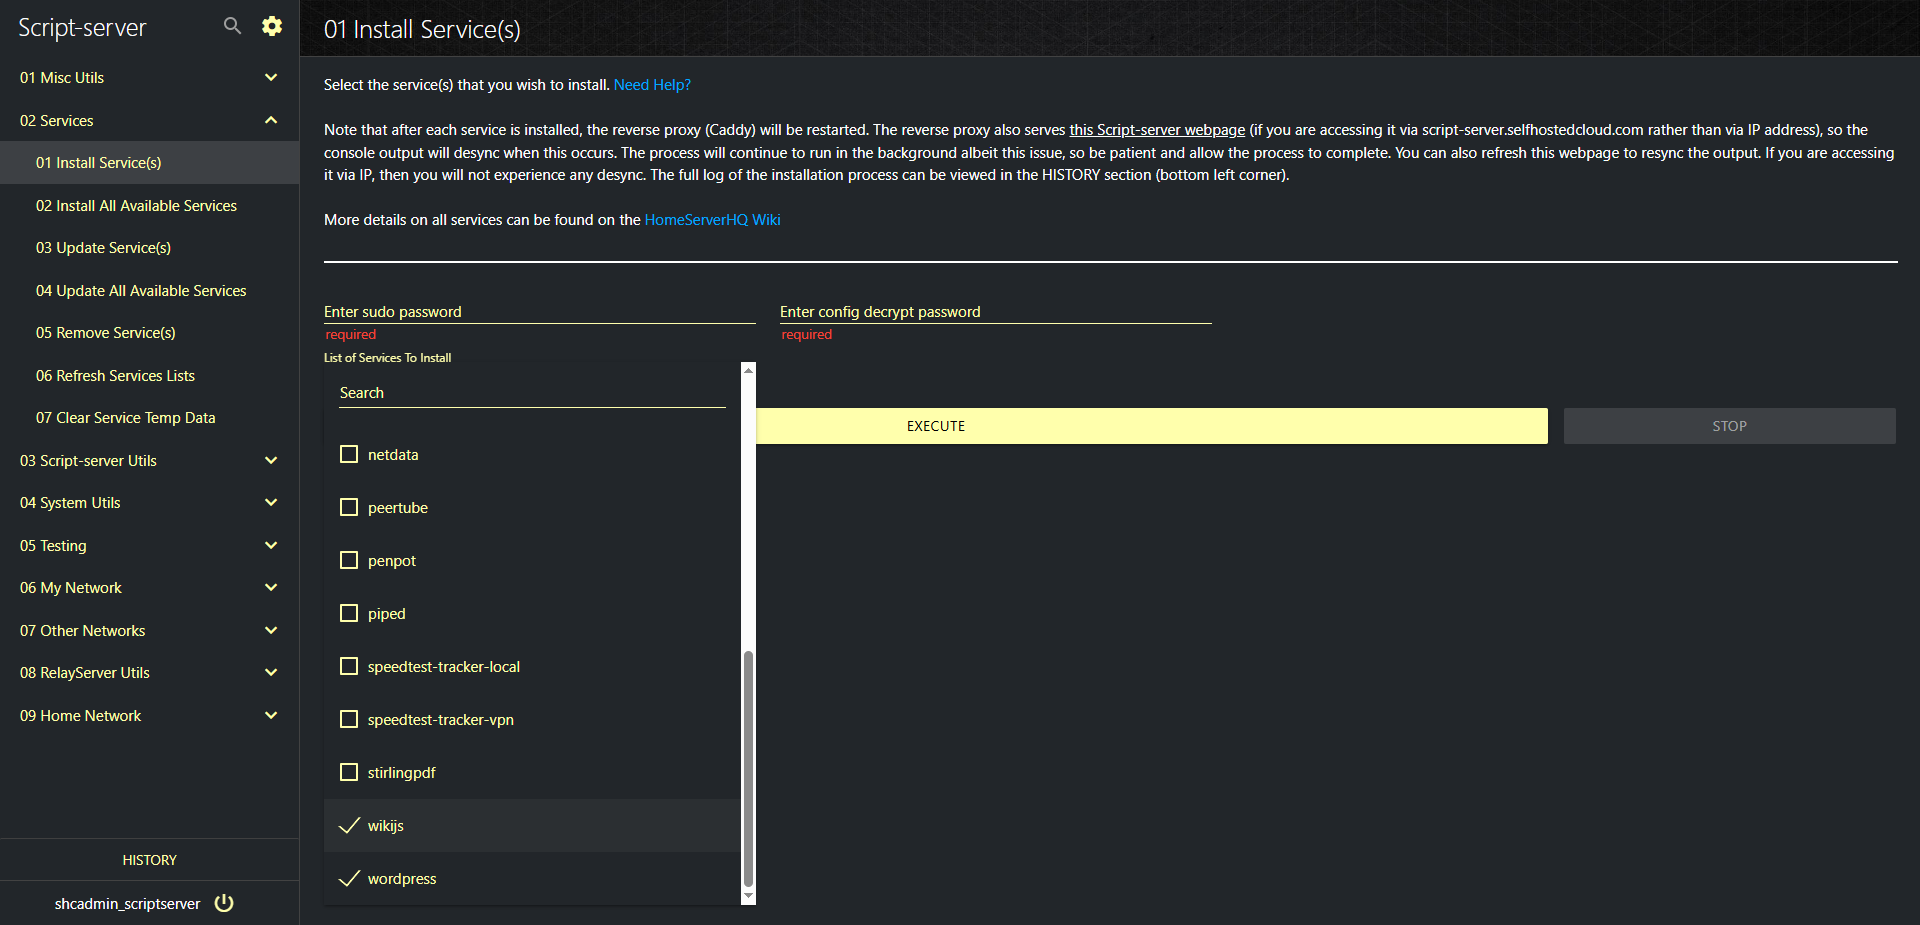
Install the web-based service that you wish to host publically onto your HomeServer. This could be a WordPress site for a blog or small business, a wiki using Wiki.js, or your could run your own custom service or site. To install a supported service, such as WordPress/Wiki.js/Ghost/etc., go to Script-server, then go to 02 Services -> 01 Install Service(s). Select your desired service from the list, enter your credentials, and execute the function.
¶ Step 2 - Host Website Locally
By default, all services supported by HomeServerHQ are available on your home network, a subset of that is available on your primary VPN network, and an even smaller subset is available on other networks on which you may be hosting. These are just defaults, anything can be modified for any specific network with a few button clicks. The most important thing is to just get your site up and running on your local home network first. Put all of your focus on the design aspects of your site - the functionality, the colors, the look-and-feel, etc, since getting the site onto the public internet within this infrastructure is trivial.
¶ Step 3 - Add Service To Primary VPN
In order to expose your website to the public internet, it must first be accessible on your primary VPN, since this is the same pathway that the reverse proxy (on the RelayServer) will use to serve the requests. By default, any services that posssess a public nature will be added to your primary VPN configuration by default. So you may not have to do anything on this step. Without getting too deep into the weeds, the files that you want to look at are ~/hshq/data/stacks/caddy-common/caddyfiles/CaddyfileBody-Primary and ~/hshq/data/stacks/caddy-common/snippets/svcs.snip.
All supported services are also added to Authelia by default, which provides an additional layer of authorization/authentication. Each service is configured differently, depending on various factors, but the configuration file to focus on is ~/hshq/data/stacks/authelia/config/configuration.yml
If you have any problems with this step, then just ask on the Forum. If you can get your website running locally, then exposing it on the public internet can be done with a few simple steps.
If the website is only for you and/or family members, then it is best to stop here and just allow internal access via your Primary VPN with your trusted devices. No need to expose it to the rest of the world unless you have to.
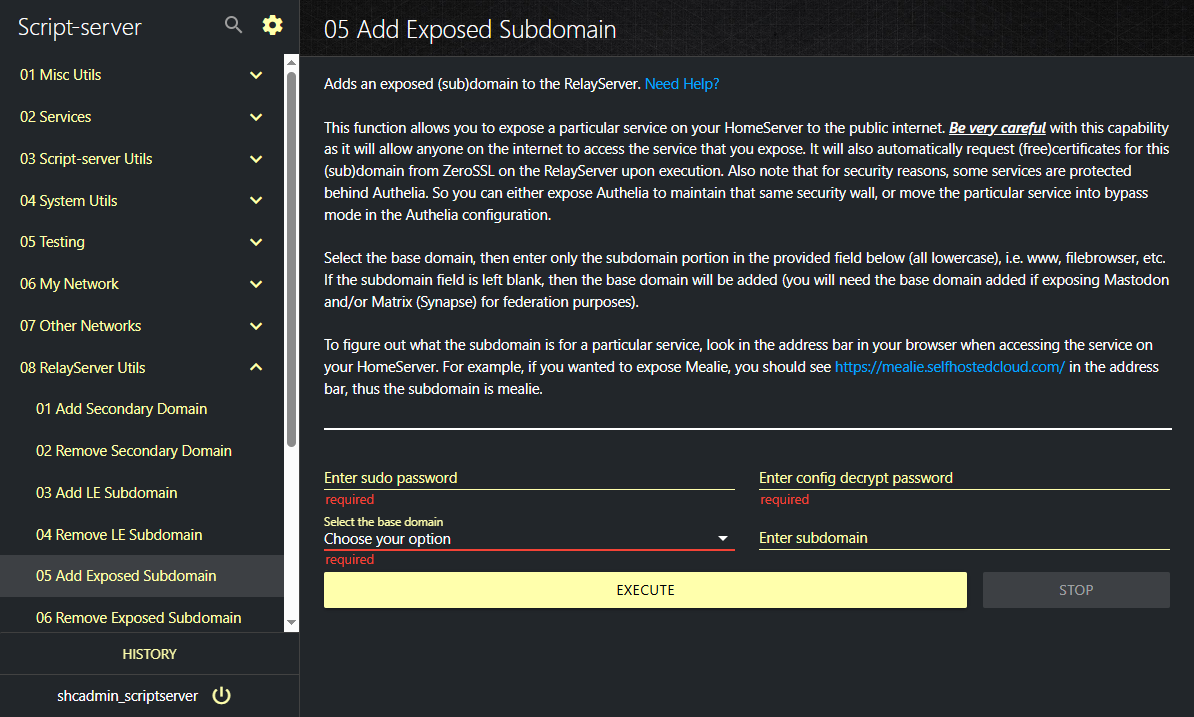
¶ Step 4 - Expose (Sub)Domain
In Script-server, go to 08 RelayServer Utils -> 05 Add Exposed Subdomain. As per the instructions, select the base domain, then enter the subdomain as indicated. The subdomain must match the same as how you access it on your primary VPN.
¶ Step 5 - Test Public Access
If your testing device is connected to your primary VPN, then ensure to temporarily disconnect from your VPN and then access the site the same way. If everything is configured correctly, then you will be accessing your site externally, as anyone else would, on the public internet.